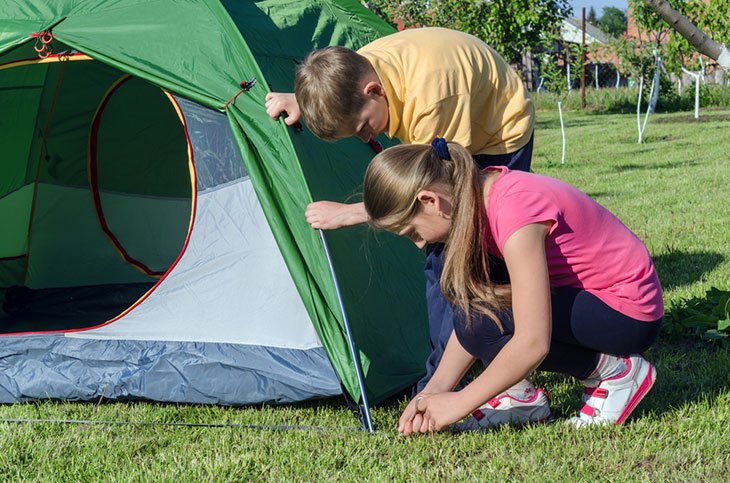
Setting up your tent should be the first thing you do when you go on a hunting expedition.
Many are the times when a hunting experience goes awry because you did not erect the tent firmly or the site ended up being inappropriate.
So, are you wondering, "How do I set up this tent quickly and nicely?"
Odds are you have the instructional manual, but it appears unhelpful.
You haven’t done this before and don’t have the luxury of hiring someone to do it.
Take it easy.
These tips on how to pitch your tent will not only make light work of the daunting task but also leave you with a shelter sturdy enough to see you through the elements.
More...
Now, it is essential that the tent is set up correctly to avoid surprises in case of gushing winds or torrential downpour.
Follow the steps below and have your tent up within no time.
Here we go!

Tip: Everything that comes with the tent is useful. Use it as required.
You will go about this in two stages:
Determining the best location for your camp has many distinct advantages.
When scouting for that perfect spot you will consider the wind factor, comfort, drainage, water supply and to some extent whether the area is secure enough.
Before deciding on where to pitch your tent, consider the following about the site:
Find a Gentle Flat Location
It is always advisable to select a flat ground because it makes setting up the tent a lot easier.
Clear the brush around, tidying up the place.
The tent site should have ample space around it, but not too open.
Choose a Spot With a Natural Windbreak
Nobody wants to have sleepless nights after spending the day on a serious hunt.
So, choose a spot that protects the tent from strong wind.
The door to your tent will face away from the wind.
Pick a Spot With a Shade
Your tent need not be exposed to the scorching sun.
Similarly, heavy rain may cause havoc to the tent. So, find a spot with a natural tree shade; not too dense.
Consider Closeness to a Water Source

Since you intend to hunt for a while, ensure your tent site isn’t too far from a water source; ideally, it should be within walking distance.
You need the water for cooking and bathing.
However do not pitch the tent too close to a water body, it might backfire in case of flooding.
You have the perfect site now. Let us pitch the tent then.
6 Easy Steps on How to Pitch a Tent
Tent pitching isn’t an easy task.
Nevertheless, to save up on valuable hunting time, yet still get a sturdier tent, I suggest you work with a colleague.
It is also critical you go through the manufacturer’s manual before setting off.
Follow these easy steps to pitch your tent correctly and enjoy your hunting season.
What do you need to have?
Step 1. Setting Base

Take the tent (and the footprint if you have one) and spread it out, the floor first then the roof of the canvas.
Ensure the tent isn’t tangled up. Make sure the guy line is free of any obstruction.
Check to ensure all other required parts are in position. Have the poles, stakes, and pegs in strategic areas around the site.
You’ll need to pick items up without having to fumble around.
Step 2. Secure the Main Pole
Securing the main pole allows you to work from a given angle. Choose either of two poles: the middle pole or corner one.
Use your hammer or a piece of rock to embed the pole into the ground.
How deep you drive the pole depends on the height of the tent, but ensure it is firm. (It shouldn’t shake)
The recommended height for most wall tents is 7 feet high.
If you have a tunnel tent, then start by inserting poles at the corners. Fix them parallel to each other all the way to the other end.
Step 3. Anchor the Guy Lines

Guy lines are vital in maintaining the structure of the tent. It works in tandem with the poles to provide sturdiness to the canvas.
To anchor it, hold it down with a heavy rock. Next, pull it tight over the firm support pole.
Have it hooked with a spike and hammer the spike firmly into the ground.
Step 4. Insert the Remaining Poles to Set the Tent
Repeat the process in step 4.
Begin with the tent pole opposite the first one. Drive subsequent poles into the ground while fastening the guy lines into place.
This action will make the guy rope stretch forcing the tent into shape. The tent will take form and rise as you pull the ropes tighter.
With a little effort, guide the tent into position as you put the posts into the ground.

Step 5. Use the Pegs to Hold the Tent Firmly in Place
Use the pegs or spikes to secure the tent corners.
They will ensure the tent doesn’t fly off when you gently raise into shape.
Hammer the stakes into place at each corner (in the holes)
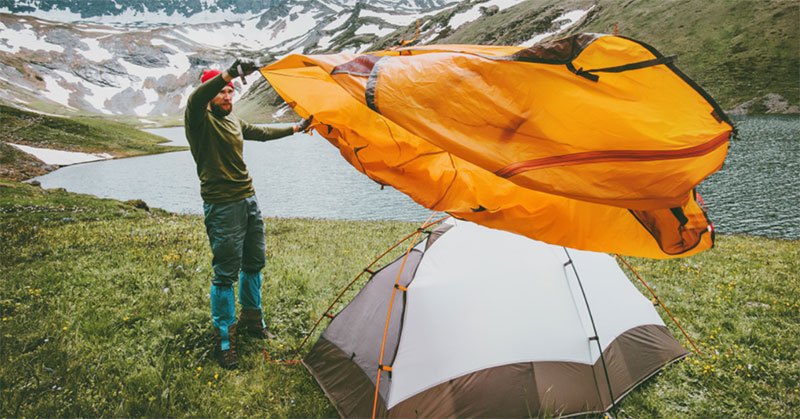
Step 6. Finish Off by Attaching the Fly
Tie or connect the fly to one of the corner poles.
Hold it width-wise and fling it over the tent roof to the other side. Check to ensure the fly is aligned with the poles.
Take the provided guy line and make a loop. Attach the loop to the fly by inserting it in the designated holes.
Next, pull the rope tight and fasten it into the ground using a stake.
Repeat the process until the whole fly is firmly in place. Your tent now has additional protection from rain.

Final Word!
Follow the above guidelines for a comfortable experience when pitching your hunting tent.
It is prudent to note that tents do come in different models and sizes.
What this means, naturally, is that there could be slight variations in the way different people pitch their tents.
However, the fundamental principle is to have the poles firmly embedded into the ground for a stable shelter.
